Leaderboard

Popular Content
Showing content with the highest reputation on 21/12/19 in all areas
-
Does your car makes nasty scraping sound when you wind down the windows, or maybe you've got scratches down your windows already? The issue is caused by the buffers the window is secured by getting worn and full of ingrained dirt like so; You'll need; * a Subaru with frameless windows (any will work mostly the same way, but this guide is for BP/BL Legacies) * socket set (mainly a 10mm) * medium JIS/Philips screwdriver * small flat head * old toothbrush * graphite powder (i got mine from repco years ago, but you can also get it from Mitre10) Step 1; First start by putting the window down. Once you've removed the door card you wont be able to without having to replug it, and thats a pain you don't need to bother with. Remove the door card, you'll have 3 screws, one behind a panel behind the chrome door handle, and two behind the door pull trim. For the one behind the chrome door handle, first hold the handle open and insert the flat head in the small opening at the top of the panel behind the handle. Try to push down to flex the panel and it should pop out. The door pull trim is a pain to remove. It is probably the hardest part of this whole thing. You'll need to pull the top of the handle towards you and kinda twist it in the direction of the dashboard. (if looking down at the handle on the drives side twist Counter-clockwise, and for the passenger side twist Clockwise Then there are many clips, lift the card up and clear of the door, and disconnect a couple of connectors. To disconnect the chrome door handle, open the hatch, unclip the two actuator cables (the top one for the lock, the bottom for the handle) from the housing and rotate the cable so the ball at the end can be removed from the handle Step 2; You'll have two metal backed buffers (green) on the inside of the window that are held in by one 10mm bolt, and two plastic backed buffers (blue) clipped on the outside of the window that you remove by pulling both sides in to unclip it. If you have the Mcintosh headunit make sure you don't drop them as the door is covered in sound deadening and will be a pain to reattach neatly. Step 3; Restore the buffers. I used a flat head screw driver to lightly pull up the pile, being careful not to damage the pile or the backing material. Once there is nothing left flattened get a old toothbrush and carefully brush it to remove the dirt. You can try wetting it, but i've found that just causes it all to clump together. Before; After; Once it looks clean you should add some graphite powder to the buffer to aid as a lubricant (you don't want something wet like silicon as it'll leave a trail on the window, and also hold dirt and make it fail again all the sooner. Step 4; Reinstall!! When you removed the inner buffers it should of left some witness marks to where it was installed at the factory. Try and put them back where they were and it should hold the window nice and secure. Otherwise reassembly is the reverse as removal. Once its back together make sure the window will go up and down and the door will shut and you should be done.8 points
-
One of the most popular threads so smashing this in here. Many of you will be finishing up work and getting ready to kick back and spend time with friends and family. Remember to take it easy out there on the roads team, think twice when you are stuck behind a camper and eager to bring that spoolie boi online to pull a savage overtake. Its better to arrive late than dead on time. sit back, take a couple breaths and enjoy the ride and look out for one another. Wishing you all a Merry Christmas and a Happy New Year!7 points
-
OK, Gripless is the winner. Pulled the ILM fuse and sure enough it was blown. Replaced it, and now the stereo back lighting, hazard switch back lighting, headlight symbol, gear lever position ( auto ) back lighting, SI Drive controller, and number-plate lights all work again. Thanks guys.4 points
-
Merry Christmas to you too! My spoolie boy is quiet and easy to forget so I should be fine On a more "what I did to my car today" note; I noticed my headlights looked dull in the horn photos, so polished them to be clear. Didnt realise how bad they were til you've done the first one and you're standing there comparing them1 point
-
IG is ignition aka not constant power. ILM illumination most likely. meter is usually dash cluster audio Navi is the power to the stereo. I’d try ILM first and lamp ones. As the interior illumination controls all your faults. But if the fuse is gone and you replace it and nothing happens check the new fuses as if you have a short then it may blow as soon as you turn the headlights on. that or you have too many high power LED lights. finding fuses the fuse block can be numbered in tiny 1-2mm high raised numbers moulded into the plastic if it’s a cream colour. the cover of the coin box which is the one you pull out to see the fuses can also have the diagram on it. pretty sure they are all numbered from 1 to maybe 32 from top left ie 1-8 9-16 17-24 25-32 still if you know a few fuse amp ratings that are together say 15-17 then look for the fuse colours in that pattern. ie blue empty yellow forgot some of the fuses are backed by a relay to the left of the fuse box. But I don’t remember one for illumination so this is for future reference.1 point
-
So using the links from Andy_Mac, and Pharnos' instructions on LegacyGT.com, I got that ADB and Fastboot installed on my PC, and sorted out the off-mode-charge setting. Pharnos, mate you're a bloody legend for working that out and posting it up, and Andy_Mac, you're a legend too for posting up the links to it. Thanks heaps guys, that made my night tonight ?1 point
-
I've always wanted a louder horn, I don't like the idea of blocking off such a large portion of the radiator tho. I'm looking at an air horn kit and mounting them behind the bumper beam / out of the way1 point
-
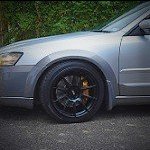
Gave it a wax. Came up real nice Need to sort that paint damage at rear wheel though1 point