


syphe
-
Posts
209 -
Joined
-
Last visited
Content Type
Profiles
Forums
Events
Store
Everything posted by syphe
-
2003 BP5 GTB had it 3.5 years, 150kms at the mo, was 117kms when I bought her.
-
heh, that pic was before a tweak I made to have it zoom in closer to the street, so thought it was safe to post, doesn\'t show my *exact* location. cheers. Power supply should be ok, need 5v at about 3amps at most, others have done similar things and supposedly the pi can be left on using the 12v constant without draining the battery too much. At this stage I\'m going to have it power on and off each time the car does, but may put a wee battery in the circuit at some point to allow it to be permanently on standby (within reason).
-
Ok, Got a few things done now. Got the Raspberry Pi loaded with raspbmc, which is a media centre install I use elsewhere in the house, it\'s very good at what it does, and with a few tweaks will be a perfect touch interface. It\'s all hooked up to a tv screen for now while testing, as soon as the touchscreen arrives I\'ll hook it up and get it running. Also got Navit loaded onto the Pi, Navit is an open source mapping and navigation software for many platforms. It uses OpenStreetMap (can use other sources) as sources for map data, and I have loaded it up with South Island maps so far. After a few tweaks to Navit I\'ve got it working very nicely, and along with the GPS dongle I purchased it gets a lock very quickly. Onto the reversing camera, it\'s all installed for now, this is the camera mounted under the hatch handle I didn\'t have too many problems getting it installed, mainly just issues with the clips holding the trim in the rear hatch were very brittle, and broke a few so had to use some double sided adhesive to get them to hold a bit better. I routed the cable for the camera under the rear left pillar trim and into the gromet between the hatch and body. It was pretty easy getting the cable through the gromet, I simply taped the cable onto a screwdriver using electrical tape and threaded the driver through the flexible gromet thing until I could remove the tape and pull the cable through. Once I had the cable through the gromet, I simply removed the rear left pillar trim with a bit of force, then pulled down the roof trim a bit so I could get access to the other side of the gromet. Once I had access I simply pushed through some of the cable and routed it down through the pillar trim. At this point I re-assembled all the panels that I had taken apart including the rear pillar trim, I have softly routed the camera cable around the rear passenger seat and under the carpets and it\'s now sitting under the front passenger carpet ready for use. At some point I\'ll try and hide it a bit more out of sight but it\'s fine for now in case I need to move things around, and besides you can\'t even see the cable unless you peel up the carpets.
-
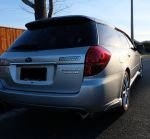
Got the reverse camera mounted in the rear hatch, will post a pic up tonight. You were right, it\'s a major pita. I found some instructions in a pdf (I\'ll post link up to that tonight also) for removing the trim in the hatch, but some of the clips in the trim were just so brittle after 10 years they were impossible to remove without breaking. I ended up drilling a hole behind the licence plate illumination lights, then taped up the wire with a bit of vac tube and electrical tape to form a seal, so should be sufficiently waterproof, if water ever manages to get under the licence plate lights. In the end that was the only hole I needed to drill, I snaked the cable in the gap behind the illumination light so no holes that can be seen from the outside, then just attached the camera using some interior self adhesive tape to the underside of the hatch handle, that\'ll do for now until I can get the screen in place and adjust the angle to suit. Weekend\'s job is to snake the cable between the hatch and the roof and hide the cable in the interior.
-
It\'s pretty easy, just need to grip it well and give it a good tug, feels like your going to break it but it comes out ok. Only thing you have to be be careful with is removing it and replacing it many times, as I have found out it ruins the surrounding area where it mounts which makes it hard to jam back in place.
-
touchscreen part number is: AT065TN14 if you search on ebay there are loads of them for sale, just sort by lowest price + shipping should get some around $73 from top rated sellers. The GPS dongle arrived today, so plugged that in and sorting out packages for that at the moment. reversing camera works fine too. will get all the bits I have connected and put up a vid of it in action soon.
-
literally 10mins after posting this thread my reversing camera arrives Looks good, nice and small think it will look the part under the boot handle in the wagon. Looks like I\'ll be playing around with this in the weekend making sure it works and maybe if I have some time can snake the cables around the car to get it installed
-
I thought I\'d post about a project I\'ve started to integrate a car PC into my Legacy. I don\'t normally post projects like this but can\'t really find many others that have done the same so thought I\'d put my build up here to help inspire others. This will all be happening in my 2003 BP5 Legacy GT. When I bought it, it didn\'t have the Nav screen installed but instead the wee cubby door in the center vent area. My requirements are * Turn by Turn GPS * Integrated into Cubby * Reverse Camera Input * Audio Output to head unit And some nice to haves * OBD2 connection for metrics * Bluetooth integration with head unit / hands free connection * iPod control My current setup is a Clarion CX501 head unit I ordered from Amazon a year ago, it\'s a simple double-din head unit which has bluetooth hands free, ipod/usb input and all the other usual features. The 2 issues I have with it are: * no rear USB input * bluetooth mic is part of the unit, and being a US unit means it is aimed at the passenger rather than the driver which makes it hard to understand me sometimes when on hands free. My last plan was to install a Nexus 7 in the cubby area, I bought a Nav bezel from a wrecker which is the OEM bezel with the buttons at the bottom, had to cut the vents to fit the tablet and got everything mounted and working. This solved many of my requirements, however had a few problems. * The nav bezel I had was not an exact fit for a 7 inch screen, and as such the bottom of the tablet couldn\'t be seen or used. * I bike to work a lot of the time so without making a concious effort to take the car out to charge the tablet, it would slowly discharge itself and turn off completely, requiring 20mins of charging before being able to power on. * I actually really like using the Nexus 7 as a tablet itself, so short of buying a 2nd it spent more time inside than in the car. Instead, I figured why not try and use the Raspberry Pi I\'ve had sitting around doing nothing for a while. For those that haven\'t heard of this little bit of kit, it\'s basically a matchbox size computer which has HDMI output, and some other basic functionality. more here: www.raspberrypi.org In the past I had this setup as a media centre in my kitchen, but have since replaced it with an Ouya to do the same thing, so for the past year and a bit it\'s been sitting gathering dust. In order to satisfy my requirements I\'d have to get a few extra bits in order to do various things, as well as all the gear to get it running in my car. Currently I have * OEM Nav Bezel with 6.5" screen opening. (Looks like this: http://legacygt.com/forums/showthread.php/fs-wa-complete-factory-navigation-system-bezel-84220.html) * Raspberry Pi Parts I need * Powered USB Hub (This is to provide extra USB ports, powered so it doesn\'t draw power from the raspberry pi). * USB GPS Receiver * 6.5" HDMI TouchScreen * Reversing Camera So far I\'ve ordered the following Digitus 7 Port USB 2.0 Powered Hub This hub was fairly cheap at about $20, apparently may not be very reliable but can always replace with something better at a later date. 12V 170° Mini Color CCD Reverse Backup Car Front Rear View Camera Night Vision Cheap Camera from ebay, cost about $15 shipped from China. Columbus V-800 USB GPS Receiver -- 66ch MTKII WAAS 5Hz Had to find a GPS receiver that works with the Raspberry Pi, this was at the top of the list at http://elinux.org/RPi_VerifiedPeripherals#USB_GPS_devices and was a decent price so I picked one up from ebay for around $45. HDMI+VGA+2AV+Driver Controller Board+6.5" AT065TN14 LCD Screen 800*480 Finally a touch screen. This was a bit hard to find as most people are after 7" touch screens which fit snug in double din locations, but because I was using the factory OEM bezel which only houses a 6.5" screen, I had to find something different. Eventually found this one, which should fit perfectly according to the specs. Key features I needed were the HDMI input and reversing camera input. I\'m already part underway, I have the raspberry pi booting up with XBMC and running off a 4.3 inch non touch screen and powered from the USB hub mentioned above. I\'ll take some pics and maybe a video of it in action over the weekend.
-
if you want the rumble you\'ll have to go for a single scroll turbo, which means you\'ll need the following bits at minimum downpipe uppipe headers turbo I think a VF34 from a V7 sti may be a good turbo to opt for if you wanted to goto this setup, some of the guys in aus have tried this, but keep in mind that it\'s a lot of work to get it all done. You\'re probably better off sticking with what you\'ve got, do just the exhaust, and if the turbo ever blows up then decide, as the twin scroll turbos we get are pretty rare to get replacements for.
-
I can probably help, what kind of car?
-
can you get access to a code scanner or vagcom cable to scan for codes? There may be a code being thrown which is causing it to go into a limp mode.
-
gotcha, I guess there\'s a lot less variables than a turbo car, 23kw would be quite impressive for a generic tune.
-
you\'d probably have to retard the timing a bit and fiddle with the maf scaling assuming it\'s been dialled in for Dacerx\'s car. With that said it\'s the tuners intellectual property, so not cool to be giving it away to others for free, especially considering how cheap some e-tuners are. You could look on romraider.com to see if anyone has made any base maps for the 3.0, you\'ll still have to do some work to get it perfect but it may give you a good start.
-
you could be hitting boost cut. I was getting similar problems but 5000rpm in 3rd gear, cause was a split in the hose from the boost controller to wastegate causing it to never open and overboost.
-
you\'re probably also introducing extra turbulence, although probably minimal by the time it gets that far down the pipes.
-
pics of the STI are out, I like it, wonder what engine it\'ll get when it arrives here. http://jalopnik.com/2015-subaru-impreza-wrx-sti-this-is-it-1496968833
-
Explain strange bits of my new Legacy to me.
syphe replied to UnitedWeFall's topic in Legacy & Outback
Cheers, I was just trying to figure this out yesterday but googling was no help, had my windscreen replaced a few weeks ago and the ETC unit near the rearview doesn\'t stay on the windscreen anymore, just hangs there, good to know I can remove it without issue. -
took a look at mine in the garage, tried and failed to move the trailer full of timber which is blocking my way out of the garage, all the rain the last few days has dug the trailer in. Will have to wait for the family to come give me a hand, may just build a deck while we\'re at it
-
couple pics of my wagon on the way up to Malborough for xmas, gave it a good wash the day before.
-
your 3.0?
-
Are you running rich with that tune? 16L/100k sounds really rich unless you have a really heavy foot. My mileage sits around 10L/100km with the same car, same pipe but without a aftermarket panel filter.
-
Wheel alignments in Christchurch, who can actually do a good job?
syphe replied to jbrizz's topic in Canterbury
Hi Tech & Wheel Alignment are the ones I use. I\'ve taken my car there many times for various little things including tires and alignments, always good customer service and Jason is a good bloke to deal with. -
nah, both twin scroll. Manuals get the TD04 which is a slightly \'better\' turbo than the VF38 that the Auto\'s get, supposedly 260 japanese horsepowers for the auto and 280 for the manual.
-
pre or post facelift? Love my pre facelift wheels, just need to fix some of the curbing that has accumulated over the years
-
Probably more symptomatic of mine being on their way out, hence the noises and so on, I\'ll find out for sure when I get the rears in how much different, but at the moment it\'s perfect for my liking.

-
Who's Online 1 Member, 0 Anonymous, 189 Guests (See full list)